by Marie | Jun 2, 2019 | Bookkeeping 101, Classes & Location, Company Setup & Management, Preferences & Customization, QuickBooks Online

There are four (4) levels of Quickbooks Online subscription: 1) Simple Start, 2) Essential, 3) Online Plus, (4) Advanced. Class tracking is only available in the Online Plus and Advanced editions.
To Turn on Class Tracking in QuickBooks Online:
Step 1. Click on the Gear icon at top right of screen (your company name) and select Account and Settings under the Your Company tab
Step 2. Click the Advanced button in the left menu bar, then click the pencil icon at Categories to edit preference.
Step 3. Check the box at Track classes (You may also want to check the box at Warn me when a transaction isn’t assigned a class)
Step 4. Click Save.
Now when you go to create your Invoices, bills, checks etc. the class option will be available for use.
by Marie | Oct 4, 2016 | Classes & Location, Company Setup & Management, Financial Statements & Reports, Preferences & Customization, QuickBooks for Mac, QuickBooks for Windows, QuickBooks Online

The main difference between class and account, is that every transaction must have an account assigned to it, while it’s optional to assign a class. So think of the class list as having a second chart of accounts which you can apply to transactions to group them into categories different from those provided by the Chart of Accounts.
Accounts mostly organize transactions into financial categories – income, expenses, receivables, payables etc., but classes let you organize transactions into any categories you want, and you have full control over what those categories are. The Class list is empty when you first create a QuickBooks company file, so you can set up any number of classes you want in it. Most often you’ll use classes for grouping transactions into management information categories as opposed to the financial accounting categories provided by the Chart of Accounts.
As a general rule, use accounts to identify the “what” of a transaction and classes to identify the “why” or “what for”. For example, if you buy Office Supplies for multiple departments and you want to keep track of each department’s use, the “what” is office supplies; the “what for” is the various departments – administrative, sales, production, etc. So office supplies (expense) should be an account and each department should be set up as a class.
Creating lots of sub-accounts is a common mistake among new QuickBooks users; however, it should be avoided at all cost. To illustrate the problem, consider this fragment from a simple chart of accounts:
Office Supplies
Marketing
Accounting
Now here is the same fragment of the chart of accounts, but with sub-accounts added:
Office Supplies
Administrative Department
Sales Department
Production Department
Marketing
Website
Events
Accounting
Bookkeeping
Audit Prep
As you can see in the illustration, the account list can become exponentially long which will produce very lengthy, unattractive financial reports. The Classes list in QuickBooks can have up to five levels (classes and subclasses), which gives you more functionality and flexibility in using the class feature. To have class information arranged in reports in a way that provides the most benefit, it does help to give some thought as to how the list should be structured.
To Turn on Class Tracking in QuickBooks Windows – Pro, Premier, Enterprise:
- Click on Edit, then Preferences in the main menu to open the Preferences window.
- Click on the Accounting icon in the left pane of the Preferences window.
- Select the Company Preferences tab in the right pane.
- Checkmark the Use class tracking item on the Company Preferences tab.
- Click OK to close the Preferences window.
To Turn on Class Tracking in QuickBooks Mac:
- Click on QuickBooks, then Preferences in the main menu to open the Preferences window.
- Click on the Transactions under Workflow and check the box that says Use class tracking.
- Click OK.
To Turn on Class Tracking in QuickBooks Online:
There are four (4) levels of Quickbooks Online subscription: 1) Simple Start, 2) Essential, 3) Online Plus, 4) Advanced. Class tracking is only available in the Online Plus and Advanced editions.
- Click on the Gear icon at top right of screen (your company name) and select Account and Settings under the Your Company tab
- Click the Advanced button in the left menu bar, then click the pencil icon at Categories to edit preference.
- Check the box at Track classes (You may also want to check the box at Warn me when a transaction isn’t assigned a class)
- Click Save.
After completing these steps, a Class column will appear in many of QuickBooks’ form windows. In some cases such as for invoices, you may have to customize the form’s template to have the Class column appear.
by Marie | Oct 2, 2016 | Company Setup & Management, Financial Statements & Reports, QuickBooks for Mac, QuickBooks for Windows

I do not recommend deleting memorized reports in QuickBooks as it has been known to cause the file to be corrupted.
One alternative is to create a folder called something like “Inactive” or “Old” and move the unwanted memorized reports there instead. Of course, this does not always happen as I have had a lot of clients do this without a problem, but it has happened multiple times in the past and you don’t know when it will happen and you certainly do not want your files getting corrupted.
How to Delete a Memorized Report in QuickBooks Windows – Pro, Premier, Enterprise
- Go to Report, then select Memorized Report List
- Select the report you want to delete in order to highlight it, then click the Memorized Report dropdown at bottom left and select Delete Memorized Report.
- Click Ok.
How to Delete a Memorized Report in QuickBooks Mac
- Go to Report, then select Report Center and click Memorized Reports
- Select the report you want to delete in order to highlight it, then click the X to the left of it.
- Click Ok.
by Marie | Apr 25, 2016 | Bookkeeping 101, Company Setup & Management, Invoicing & Receivables, QuickBooks for Mac, QuickBooks for Windows, QuickBooks Online, Reimbursements and Investments

The most common cause of this problem is that some items are using COGS for the income account. If you have invoices with items that have a COGS account as their income account, this will definitely cause a negative Cost of Goods Sold. Review the invoices hitting COGS and see which actual items are involved and then change the items in the item list. You have more credits than you do debits and those credits are coming from invoices hitting Cost of Goods Sold. COGS should be a debit with no invoices in the detail. You need to look at the invoices that are hitting COGS and see which exact line item it is. That is the item that has the incorrect account for income. That said, there a few other things that can cause the COGS to be negative.
Few things that can cause the COGS to be negative:
- Using an item on the invoice that has a COGS account as the income account
- Using an inventory item on a credit memo
- Using the COGS account as a credit on a journal entry
- Using the COGS account on a deposit
To fix the negative Cost of Goods Sold problem:
To locate and correct this issue, you need to start by generating a detail transaction report of your Cost of Goods Sold account(s). Once you have done that, double-click on all the negative transactions to see what exactly is causing the problem. You can also select the Reports button at the top of the transaction (not the top-level menu) and then select Transaction Journal. You can press Ctrl Y while the transaction is open to see what the underlying journal is.
You are looking for amounts in the Credit column for the COGS account – debits increase it, credits decrease it. If you are using items, inventory and other functionalities of QuickBooks, the direct problem could be one or more bills, checks, credit card charges, Invoices, credit memos, journal entries, or deposits. This report will show you exactly what is causing it.
In addition, you need to make sure that reimbursable expense is an Income account if you have reimbursables, and also ensure that the option is checked in the Preferences to track reimbursable expenses by going to Edit, Preferences, Time & Expenses, Company Preferences and make sure “Track reimbursed expenses as income” is checked.
Similar Articles:
by Marie | Oct 24, 2014 | Company Setup & Management, QuickBooks for Mac, QuickBooks for Windows, QuickBooks Online
I got a call a few days ago from a concerned small business owner saying that some of the transactions she is entering into QuickBooks is simply disappearing and nowhere to be found. When I got there she opened the QuickBooks file in question, and indicated to me all the transactions she entered and where they should have been. I told her not to worry that I would find the transactions especially because it is impossible for them to just vanish into thin air. Possible Scenarios:
- Work is being done in more than one backup files of the same company, and the transactions in question were entered in more than one – depending on which was opened at the time data were entered. (Only with Mac)
- More than one company files were created for the same company, and transactions were entered into more than one – alternately – depending on which was opened at the time data were entered.
- The company file was replaced or overwritten by an older version of the file when a backup was restored. (Only with PC)
I have been using QuickBooks for such a long time that it did not take much time for me to realize that there had to be another file housing the “missing” transactions, and so I set out to view the other QuickBooks files that were on the Mac. Sure enough, the transactions were entered in three different QuickBooks files. There were like 10 transactions in one file, which were possibly entered in one sitting, then the next 17 in another, and another 38 in the next. That is one very big difference between the Mac and PC versions of QuickBooks; unlike the PC versions, each time QuickBooks is backed up on a Mac, it creates a different backup file with an image titled “Disk Image”. This makes it particularly easy to use a different QB file each time an update is done, without actually noticing until you really need to. To prevent this happening again:
- Always open the file (of the company in question) from within QuickBooks (instead of the desktop or wherever the file is stored) by going to File, then Open Recent and selecting the file on top, which would be the most recent file used.
- Turn of automatic backup so it does not create multiple backup “Disk Images” which can be quite confusing (Mac users). To do this, go to QuickBooks and select Preferences, then in the Preferences window double click Backup. This will then take you to a new window with backup options. Uncheck all boxes to turn off automatic backup, or you can customize to suit your needs. I usually only check the Overwrite last backup box, which is not a wise choice for someone prone to making mistakes.
- If you would prefer to keep the automatic backup running, and also open your files from wherever they are stored (instead of within QuickBooks), be sure to view the date each file was last modified and continue to use the one with the latest modification date.
So, this is what I did! I deleted all the QB files “Disk Images”, leaving only the one that was last modified which was also the one that most of the “missing” transactions were entered in. I then edited the backup preference and selected the option which was best suited to her, and that was, allowing manual QuickBooks backup instead of automatic. When she is ready to backup, she will then go to File, then Back Up…, and select the location (desktop or document) and file she would like to backup to.
Mission accomplished! Problem solved!
by Marie | Aug 7, 2014 | Bookkeeping 101, Chart of Accounts Setup & Management, Company Setup & Management, Payroll Setup & Management

I have gotten so many questions about recording owners salary accurately and allocating payroll for direct labor workers versus admin staff, I have decided to elaborate on it a bit here.
- Cost of Goods Sold includes payroll that is associated with the creation of a sale or sales. For example when an electrician employee goes to work on an electrical assignment that the company invoice for, that payroll cost should be recorded to Cost of Goods Sold otherwise called Cost of Sales. In addition, Cost of Goods Sold includes all expenses that are accumulated as a result of completing a job that leads to an income. Expenses such as raw material, items purchased for resale, cost of parts used to construct a product for resale are all Cost of Goods Sold. If an equipment is rented to aid in the process of a job that will lead to an income, it is also to be classified as Cost of Goods Sold. If an employee uses a portion of his or her day to engage in the direct creation of a product for resale and a portion to engage in administrative tasks, the portion that is related to building the product should be coded to COGS and the admin portion coded to regular payroll expense.
- Officers’ salaries should not be classified as Cost of Goods Sold, even if a sale was derived from his or her direct input. It should be allocated to payroll with an item name such as Officers Salary in order to differentiate it from other payroll items. Regular payroll, Cost of Goods Sold payroll, and Officers’ salaries payroll are each reported separately on Income tax forms. However, in order for a company to be able to pull a Profit and Loss Report for example, and get an accurate synopsis of the overall cost of sales, the amounts for Cost of Goods Sold – including the Officers’ salaries that are direct cost of sales will need to be coded to Cost of Goods Sold. Separating them with their unique item names, will allow you to generate reports that show the total of each so as to include them in their rightful places on your tax forms with ease.
- When we speak of payroll, it is usually to define payments made at regular intervals for work done by employees which includes employees’ deductions as well as employers assigned portions that must be reported and paid to various government agencies. However, for Corporations, payroll includes Officers as well as employees. Owners of Corporations are called Officers, and they are required to include themselves on their company’s payroll, as their company is viewed as a separate person or entity – legally. For Sole Proprietors, and Limited Liability Companies (LLC’s) operating as Sole Proprietors, they are free to withdraw monies and record their drawings as Owners Draw. LLC’s operating as Corporations must follow the same procedure as Corporations discussed above.
Thus, monies paid to staff involved in direct sales – Cost of Goods Sold, Officers, and administrative staff are all classified as payroll.
by Marie | Jul 26, 2014 | Company Setup & Management, QuickBooks Online, Third Party Applications - QuickBooks Compatible
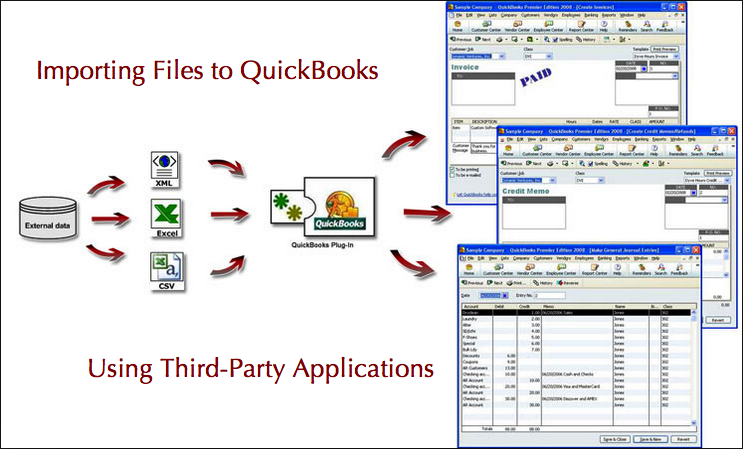
QuickBooks is built to work with interchanging of data from one edition of QuickBooks to another using IIF (Intuit Interchange Format), and from CSV (Comma Separated Values) files such as excel, to QuickBooks. However, there are limitations to the extent that QuickBooks provide and allow. For example, you can import your list of customers, vendors, items, and chart of accounts to QuickBooks, but not your invoices, estimates, or any other forms. This is where third party applications come in, to extend QuickBooks usability beyond its limitations.
With QuickBooks being so popular, many software developers have developed and are still developing applications that work and aim to work seamlessly with QuickBooks to get forms and files into QuickBooks from other media, such as excel, access, text, and ODBC (Open Database Connectivity). Thus, there are many applications available to carry out the various tasks that may need to get done, such as:
- Transfer of data between QuickBooks company files
- Transfer of data between QuickBooks and an e-commerce site
- Transfer of data between QuickBooks and generic file formats
- Transfer of data between QuickBooks and other programs
Albeit that, QuickBooks database is “closed” and access to their data tightly controlled and so only a few developers will be able to gain access to create a system software that effectively integrates with QuickBooks. Two such importers are:
You can view a complete list of Transaction Pro Importer features, and also IIF Transaction Creator Pro features. Transaction Pro Importer currently does not support Mac platform, but IIF Transaction Creator does. There is also a data transfer program that allows interchanging of information strictly between QuickBooks files known as Data Transfer Utility. This program by Karl Irvin most distinct feature is the merging of two QuickBooks company files.
Importing items into QuickBooks via excel is a two step process; first you have to export them to a file (.CSV, .IIF), and subsequently import the file(s) into QuickBooks. With a third party import software such as Transaction Pro Importer, you import files and forms directly through the program. You can always download a free trial for a test run of each importer program before making your purchase. The main detail to remember when using these importing applications is to always make a backup copy of QuickBooks before importing anything into QuickBooks. These programs and software are man-made, and as such, prone to err.
Visit QuickBooks Marketplace and search for a list of third party applications that integrates with QuickBooks for your industry type, and specific need.
by Marie | Oct 29, 2013 | Company Setup & Management
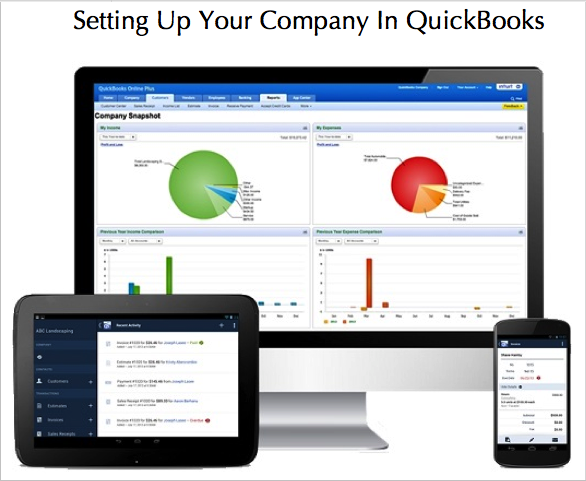
Ok, so you have just purchased QuickBooks and getting ready to start setting up your company and entering your company’s info. but you are not feeling confident you can do it correctly. No worries! Look no further! I have set up tons of companies in various industries with different types of structures, and that topped with my accounting experience have allowed me to hone all the knowledge and skills necessary to help you accurately set up your company on QuickBooks for the first time.
Depending on the type of business you are operating, you may not need to delve into all the areas of company setup, but you can browse the headings below to see what areas will affect your business.
- Chart of Accounts Setup
- Customer & Vendor Setup
- Employee Setup
- Item & Inventory Setup
QuickBooks comes with an interview section to help with the setting up of a company. Most of the questions are optional and can be bypassed and entered at a later date. However, from my experience using QuickBooks, I recommend taking the time and completing each question or category in the interview. This way, you will not be inconvenienced when you have to get an invoice done, for example, and the company’s information is not pre-filled on the invoice nor the requested items setup in QuickBooks. Of course you will need to enter information from time to time, such as adding a new customer or vendor or a new account for your business, but when the majority of necessary information is entered in the initial stage, it will definitely allow for a more smooth flow and running of your company in general.
Chart of Accounts Setup
The Chart of Accounts is the backbone of your company’s accounting system, and as such, care needs to be given when setting up the Chart of Accounts. QuickBooks will produce a Chart of Accounts based on the industry and entity type you have chosen during the interview but you will most certainly need to customize your Chart of Accounts by deleting the accounts you will not be using and adding the ones you will be using, subsequent to the interview. Most of the accounts should be usable as the developers of QuickBooks have done a remarkable job with matching the type of business to its Chart of Accounts type.
If you are a new business owner your chart of accounts may not yet be established, but if you have been in business for a while you should have a list of accounts that your business use. All companies have assets, liabilities, equity, income, and expenses; however, the types and names of these accounts may not always be the same. For example, if your company has several streams of income, you could give each its source name such as architecture income, renovation income, landscaping income. This will make it easy to track the amount of income that is generated from each income source for whatever period. The same principle can be applied to assets, liabilities, equity, and expenses. You should also setup all your bank and credit card accounts, and enter their opening balances as at your start date in QuickBooks as well.
Item & Inventory Setup
If your company is not a non-profit, you are in business to make money. What do you sell? Services? or Goods? You will need to create an item or items for the various things you sell, that you will be invoicing for. If you are selling a variety of services you should create an item for each and set a unit cost if that cost will not fluctuate. For example, if you sell landscaping services and you have a fixed unit price of say $2000 per sq. yard, you can preset this $2,000 so that each time you are invoicing this will automatically be filled in as the unit cost at which point you will only need to input the number of units or quantity. If you are a product-based company and need to keep track of inventory, you will first need to turn on the inventory tracking preference in QuickBooks. After you have done that, you will then need to set up each product item with their unique name and unit of measure associated with each. You will need to enter the cost (what you paid for the item), the price (what you will be selling it for), the amount you have on hand, and a reorder point (the minimum amount you need to have on hand before QuickBooks reminds you to reorder).
Customer & Vendor Setup
Your customers and vendors information can be imported into QuickBooks from an excel spreadsheet or other versions of QuickBooks. This will be particularly helpful for companies with vast amount of customers and vendors. You will need to set their opening balances as at the date you are starting to track your company’s finances in QuickBooks. For example, if a customer owes you a balance of $10,000 on December 31, 2013 and you are setting up your company starting January 1, 2014, you will enter $10,000 in the opening balance field when you are setting up your customer in QuickBooks. All sales receipts and Invoices processed subsequent to the date you have started your business in QuickBooks, should be created and payments applied as necessary.
Employee Setup
If you are not a sole proprietor and have employees, you can setup your employees in QuickBooks and process their paychecks in QuickBooks. The desktop version allows you to house your payroll information on your desktop, but with the Mac and Online versions of QuickBooks your payroll will be housed “in the cloud” meaning remotely on Intuit’s server. They all will produce your employee(s) paycheck(s), but the difference is in the method used to generate them.
You can visit my step by step QuickBooks Tutorial website where you will find step by step instructions for setting up your company in QuickBooks and everything QuickBooks related. Please feel free to share your thoughts on this topic, and add any input you have.

Recent Comments