by Marie | Jun 3, 2019 | Bookkeeping 101, QuickBooks Essentials, QuickBooks Online, Resources
Test QuickBooks Online Before Purchasing
QuickBooks creators are generous and they have created a mock site where you can literally try out a lot of their features and see how QuickBooks operate – if it’s a right fit – before you make your purchase. This is awesome! (The Miz style awesome:)
Here is the Sample QuickBooks Online Test Drive File that you can practice in before jumping right in to your own “real” company file. It’s a great way to get a feel of QuickBooks without fear of making a mess of your company file. It does not save any data you put in, and so you’ll need to finish any processes you are doing – in one sitting. When it refreshes, all the work you’ve done in it will be lost, and if left idle for more than 30 minutes it will log you out.
So go ahead and check it out. Let me know how it has helped you. If you have any QuickBooks questions, don’t hesitate to send me your questions.
NOTE: QuickBooks Online is available in 4 subscription options. See a list of QuickBooks Online subscription options.
FREQUENTLY ASKED QUESTIONS
ALL QUICKBOOKS OPTIONS:
by Marie | Aug 27, 2016 | QuickBooks Essentials, Resources

Using QuickBooks Desktop Shortcuts can really help to make life using QuickBooks easier. Here is a list to familiarize yourself with:
Opening & Closing QuickBooks:
| Ctrl |
Start QuickBooks without opening a file. This is useful if you are having problems with the last company file you were using – and you want to start with the Open or Restore Company window |
| Alt |
Start QuickBooks without all the windows. If you have your desktop set to remember what windows you have open, sometimes it takes a VERY long time to start QuickBooks. This option will start it without opening all the windows |
| Alt+F4 |
Close QuickBooks |
Date Shortcuts:
| + |
(plus key) Advance to the next day |
| - |
(minus key) Previous day |
| T |
Today |
| W |
First day of the week |
| K |
Last day of the week |
| M |
First day of the month |
| H |
Last day of the month |
| Y |
First day of the year |
| R |
Last day of the year |
| [ |
(left bracket) Same day in previous week |
| ] |
(right bracket) Same day in next week |
| ; |
(semi colon) Same date last month |
| ‘ |
(apostrophe) Same date next month |
| Alt+down arrow |
Opens the calendar for date selection (the small date calendar, not the “Calendar” feature) |
Editing QuickBooks Transactions & Lists:
| Ctrl+Del |
Delete the selected line in a transaction |
| Ctrl+Ins |
Insert a blank detail line in a transaction |
| Ctrl+N |
Create a new transaction or list item |
| Ctrl+D |
Delete the current transaction or list item. Please note that you cannot reverse this once done |
| Ctrl+E |
Edit an item in an item list, or in a register |
| Ctrl+O |
If you are looking at a check in the write checks window, or in the check register, use ctrl-O to copy the check. You can then use ctrl-V to create (paste) a copy of that check if you are in the check register |
| F5 |
Refresh List. You only see this if you are in multi-user mode, when you have a “list” open. This will force QuickBooks to go back to the database server and retrieve the latest copy of the list. If multiple users are editing the list this may be useful. Note that all lists that are open at the time should be refreshed. |
QuickBooks Windows & Lists:
| Ctrl+W |
Opens the write check window to write a new check |
| Ctrl+Q |
Open a Quick Report for a list item when you have selected the item in the list |
| Ctrl+Y |
Open a transaction journal for a transaction, if you are viewing the transaction |
| Ctrl+J |
Open the customer center |
| Ctrl+A |
Open the Chart of Accounts |
| Ctrl+I |
Open the create invoice window to create a new invoice |
| Ctrl+L |
Open a list – if the cursor is in a field that has a dropdown list, such as selecting the item in an invoice detail line, this will open the list associated with that dropdown |
| Ctrl+U |
Use the list item if you have just used ctrl-L to open the list from a transaction. This is a very useful feature that many people aren’t familiar with. See a more detailed explanation in my article on Improved List Selection |
| Ctrl+R |
Most transactions have a register associated with them. This opens the register for the transaction you are looking at |
| Ctrl+G |
This is an odd one I’m still figuring out. If you are in a registerfor an account, entering ctrl-G will take you to the register for the “transfer” account associated with the line you have selected |
| Ctrl+F |
Opens the find window for the list or transaction type you are working with. This is the old-style Find, not the new Searchfeature (F3) |
| F1 |
Opens the Help window |
| F2 |
Displays the Product Information window, which has a large amount of information that can be very helpful when diagnosing problems in QuickBooks (Ctrl-1 is an alternate) |
| F3 |
Starting with the 2011 version, this opens the newer Searchfeature (as opposed to the Find feature) |
| F3 |
If you have the Product Information window open (by pressingF2), pressing F3 here will open the tech help window. This provides a wide range of system and diagnostic information, as well as being a quick way to view (and possibly edit, if you are careful) a number of support and technical files that relate to QuickBooks operations (Ctrl-2 is an alternate) |
| F4 |
This opens the QuickBooks Technical Support Helper window |
| Ctrl+1 |
This does the same as F2, opening the Product Informationwindow |
| Esc |
Close the current window |
| Ctrl+F4 |
Close the current window (same as Esc) |
| Ctrl+F6 |
Move to the next open window and make it active. NOTE that for some reason SOME windows don’t allow this, such as theAccountant Center (thank you Mary Longacre for pointing that out) |
| Ctrl+Tab |
Same as Ctrl-F6, moves to the next open window |
| Ctrl+H |
Open the Transaction history – if you have a transaction like an invoice, which has payments applied to it, the transaction history can be very useful |
QuickBooks Maneuvering:
| + |
(plus key) Increase a number in a form, such as a check number or invoice number |
| - |
(minus key) Decrease a number in a form, such as a check number or invoice number |
| Alt+S |
Save the current transaction |
| Alt+N |
Save the current transaction and go to the next |
| Alt+P |
Go to the previous transaction |
| Tab |
Go to the next field |
| Shift+Tab |
Go to the prior field |
| Up Arrow |
Go to the previous line in a form |
| Down Arrow |
Go to the next line in a form |
| Page Up |
Move to a previous page in a form area or report |
| Page Down |
Move to the next page in a form area or report |
| Ctrl+Page Up |
Move to the first item in a list or register |
| Ctrl+Page Down |
Move to the last item in a list or register |
| Enter |
If you are viewing a report this will “quick zoom” – open a register or detailed report. In other windows this will often select the highlighted button/operation |
| Ctrl+Enter |
Record (save) the current record. If you have several buttons at the bottom of a transaction window (like “Save & Close”, “Save & New”, “Clear” and so forth) then Ctrl-Enter will select the best “save” option available. Enter will select the button that is highlighted, which might not be the best “save” option |
Memorized Transactions:
| Ctrl+M |
Memorize the current transaction. This opens the memorize transaction window |
| Ctrl+T |
Create a new transaction from a memorized transaction. This opens the memorized transaction list |
Miscellaneous Shortcuts:
| Ctrl+P |
Print |
| Ctrl+R+P |
If you have been trying to register QuickBooks, and you have been given a “validation code”, you can easily get to the registration window where it asks you for this code without having to go through all the normal steps for registration. Open QuickBooks, select Help and then About QuickBooks.When the product splash screen shows, press Ctrl-R-P (hold the Ctrl key down then press R and P in succession). This opens the window that lets you enter your validation code |
Standard Text Editing:
| Ctrl+Z |
Undo typing or changes made in field |
| Ctrl+X |
Cut (copy the selected text to the clipboard and remove it from the field). |
| Ctrl+C |
Copy the selected text to the clipboard |
| Ctrl+V |
Paste text from the clipboard to the field |
| Del |
Delete a character to the right |
| Backspace |
Delete a character to the left |
| Home |
Go to the first character in the field |
| End |
Go to the last character in the field |
| Ctrl+Right Arrow |
Move to the next word in a current text field |
| Ctrl+Left Arrow |
Move to the previous word in a current text field |
As with anything else, the more you use them, the better you will get at using them.
RELATED: QuickBooks Online Shortcuts + Michelle Long’s One Click Trick
by Marie | Aug 24, 2016 | Customer Setup & Management, Preferences & Customization, QuickBooks Essentials

Accurate job costing is one of the most crucial tasks for managing job-based businesses such as construction companies, professional services firms, and even non-profits that are awarded grants. Many owners put this off because it seems too complicated or time-consuming; however, if you are serious about helping your business grow and flourish, you need to do this sooner than later. It will help you to:
- Analyze how each of your jobs is doing financially
- Identify jobs that were not as profitable as expected
- Identify problem jobs as early as possible
- Create better estimates for future jobs
QuickBooks is an inexpensive program that can do powerful job costing with the data you are already entering, providing you set it up and use it correctly. Here are the three (3) steps to get this done:
The first step to setting up QuickBooks for job costing is to set your preferences: You do this by going to Edit, Preferences, then Company Preferences:
 Go to Jobs & Estimates and check the box next to Do you create estimates. You might also want to check the box next to Do you do progress invoicing.
 If you use QuickBooks for payroll – as every business doing job costing should, go to Payroll & Employees and check the box next to Job costing, class and item tracking for paycheck expenses.
 If you track employee or subcontractor time by job, go to Time & Expenses and check the box next to Do you track time. If you do time & material billing, you should also check Create invoices from a list of time and expenses.
The second step is to setup your customer:jobs and use them on every transaction:
Go to the Customer Center and click on the New Customer & Job button.
You might also want to create a customer called “Overhead” or “Administrative” for non-job expenses so you get into the habit of entering a customer:job on all your transactions. The Contractors edition also has a really helpful special job costing report called “Expenses Not Assigned to Jobs”. If you are using classes, you might want to consider doing the same thing so you can use the Profit & Loss Unclassified report to make sure you didn’t accidentally leave off a class. Very useful feature!
The third step is to setup items and use them on every transaction:
Go to Lists, Item List, click on the List button, and select New.
Add a new service item for every job phase you want to job cost. For subcontractors, this could be as simple as Labor and Materials. For general contractors, it could be quite lenghty: plans, site work, excavation, concrete, masonry, framing, etc. In this case, you might want to add sub-items for Labor and Materials to your items if you want to track those costs separately. This also makes it easier to report only the Labor portion of a subcontractor’s invoice on their 1099.
If you are a contractor with short-term jobs, be sure to set up all your Service Items as two-sided, with both an expense and an income account. This does not occur automatically and unfortunately it is not very intuitive. You need to put a check next to This service is used in assemblies or is performed by a subcontractor or partner for the expense box to be added to the setup screen. Contractors often use a cost of goods sold account called something like “job related costs” for “job-related expenses”.
 Builders and many professional service firms have projects that span several months or more, generally use a work in progress (WIP) or construction in progress (CIP) asset account because job related costs are not usually expensed until the project is completed. In this case, you should map the expense account to their WIP or CIP asset account.
 Depending on your circumstances, there are also several “Other Charge” items you should set up. These do not need to be two-sided if:
a) You use WIP or CIP accounts, you should setup two items: (1) Transfer out of WIP – with WIP as the account and note in the description that the amount should be positive, and (2) Transfer into COS – with COS as the account and note in the description that the amount should be negative
b) You accept customer deposits or retainers, you should setup an item mapped to a current liability account. For better tracking, you should consider setting up a separate current liability account just for deposits.
c) You have customer retention or retainage, you should setup an item mapped to an accounts receivable account and a negative for the Amount (for instance, -10% if your retainage is 10%). For better tracking, you should consider setting up a separate accounts receivable account just for retain age.
This should help you immensely if you put it in place now, and start using it – at all times.
by Marie | Aug 24, 2016 | QuickBooks Compatibility & Industry Types, QuickBooks Essentials, QuickBooks for Mac, QuickBooks for Windows, QuickBooks Online, Resources, Third Party Applications - QuickBooks Compatible
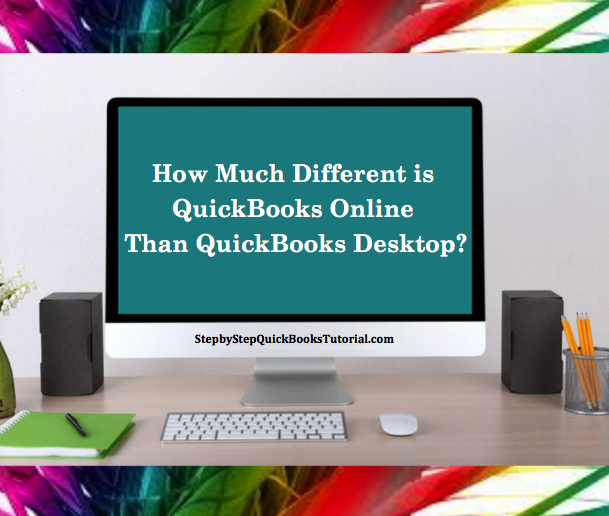
QuickBooks Online interface is very different, and if you are use to the desktop versions, you probably will not like the Online version. It works differently and what can be easily done in the desktop version in a few, usually requires jumping through 2+ hoops in the online version. It is actually more expensive in the long run and clients who have more than one business will definitely find the desktop version more cost effective.
However, according to its maker – Intuit, QuickBooks Online will be the future and so it’s best to get on board sooner than later. Also, I have to say QuickBooks Online has improved greatly within the last three years, and prior to these improvements I was not recommending it at all to my clients.
As with everything else, QuickBooks Online has its advantages as well as disadvantages. The two (2) main advantages of QuickBooks Online being: 1) The ability to access it from anywhere with an internet connection on multiple devices, as well as host multiple users simultaneously. And 2) QuickBooks Online has a ton of third-party applications that can be integrated to make it do much, much more than it already does by itself.
The main disadvantage is that you have to pay a monthly fee which will undoubtedly be increasing over time, and something you will have no control over. Also, if you have multiple businesses, you will need to have a QBO account for each – unlike the desktop version where you could have as many companies in the one version as you like.
The world is becoming more pro “cloud” whether we like it or not, and so it is inevitable that we will need to be a part of that if we want to do any form of business. I say find the positives, and get with it.
Recent Comments