by Marie | Jun 2, 2019 | Bookkeeping 101, Classes & Location, Preferences & Customization, QuickBooks for Mac

To Turn on Class Tracking in QuickBooks Mac:
Step 1. Click on QuickBooks in the top menu bar, then Preferences to open the Preferences window.
Step 2. Click on the Transactions under Workflow and check the box that says Use class tracking.
Step 3. Click Ok.
Now when you go to generate your Invoices, bills, checks, etc. the class option will be available for use.
by Marie | Jun 2, 2019 | Bookkeeping 101, Classes & Location, Preferences & Customization, QuickBooks for Windows

To Turn on Class Tracking in QuickBooks Windows – Pro, Premier, Enterprise:
Step 1. Click on Edit, then Preferences in the main menu to open the Preferences window.
Step 2. Click on the Accounting icon in the left pane of the Preferences window.
Step 3. Select the Company Preferences tab in the right pane.
Step 4. Checkmark the Use class tracking item on the Company Preferences tab.
Step 5. Click OK to close the Preferences window.
Now when you go to generate your Invoices, bills, checks, etc. the class option will be available to use.
by Marie | Oct 29, 2013 | Company Setup & Management

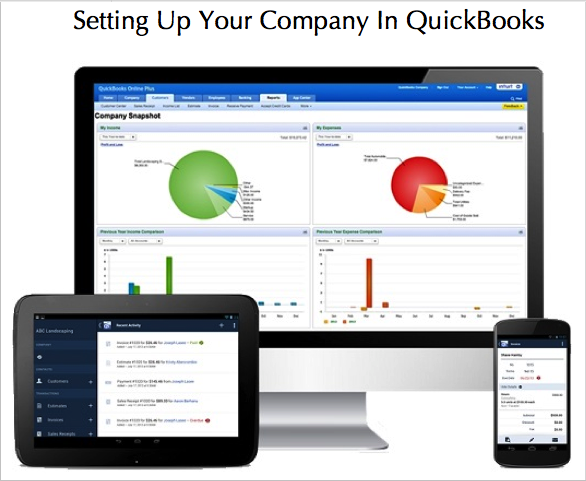
Ok, so you have just purchased QuickBooks and getting ready to start setting up your company and entering your company’s info. but you are not feeling confident you can do it correctly. No worries! Look no further! I have set up tons of companies in various industries with different types of structures, and that topped with my accounting experience have allowed me to hone all the knowledge and skills necessary to help you accurately set up your company on QuickBooks for the first time.
Depending on the type of business you are operating, you may not need to delve into all the areas of company setup, but you can browse the headings below to see what areas will affect your business.
- Chart of Accounts Setup
- Customer & Vendor Setup
- Employee Setup
- Item & Inventory Setup
QuickBooks comes with an interview section to help with the setting up of a company. Most of the questions are optional and can be bypassed and entered at a later date. However, from my experience using QuickBooks, I recommend taking the time and completing each question or category in the interview. This way, you will not be inconvenienced when you have to get an invoice done, for example, and the company’s information is not pre-filled on the invoice nor the requested items setup in QuickBooks. Of course you will need to enter information from time to time, such as adding a new customer or vendor or a new account for your business, but when the majority of necessary information is entered in the initial stage, it will definitely allow for a more smooth flow and running of your company in general.
Chart of Accounts Setup
The Chart of Accounts is the backbone of your company’s accounting system, and as such, care needs to be given when setting up the Chart of Accounts. QuickBooks will produce a Chart of Accounts based on the industry and entity type you have chosen during the interview but you will most certainly need to customize your Chart of Accounts by deleting the accounts you will not be using and adding the ones you will be using, subsequent to the interview. Most of the accounts should be usable as the developers of QuickBooks have done a remarkable job with matching the type of business to its Chart of Accounts type.
If you are a new business owner your chart of accounts may not yet be established, but if you have been in business for a while you should have a list of accounts that your business use. All companies have assets, liabilities, equity, income, and expenses; however, the types and names of these accounts may not always be the same. For example, if your company has several streams of income, you could give each its source name such as architecture income, renovation income, landscaping income. This will make it easy to track the amount of income that is generated from each income source for whatever period. The same principle can be applied to assets, liabilities, equity, and expenses. You should also setup all your bank and credit card accounts, and enter their opening balances as at your start date in QuickBooks as well.
Item & Inventory Setup
If your company is not a non-profit, you are in business to make money. What do you sell? Services? or Goods? You will need to create an item or items for the various things you sell, that you will be invoicing for. If you are selling a variety of services you should create an item for each and set a unit cost if that cost will not fluctuate. For example, if you sell landscaping services and you have a fixed unit price of say $2000 per sq. yard, you can preset this $2,000 so that each time you are invoicing this will automatically be filled in as the unit cost at which point you will only need to input the number of units or quantity. If you are a product-based company and need to keep track of inventory, you will first need to turn on the inventory tracking preference in QuickBooks. After you have done that, you will then need to set up each product item with their unique name and unit of measure associated with each. You will need to enter the cost (what you paid for the item), the price (what you will be selling it for), the amount you have on hand, and a reorder point (the minimum amount you need to have on hand before QuickBooks reminds you to reorder).
Customer & Vendor Setup
Your customers and vendors information can be imported into QuickBooks from an excel spreadsheet or other versions of QuickBooks. This will be particularly helpful for companies with vast amount of customers and vendors. You will need to set their opening balances as at the date you are starting to track your company’s finances in QuickBooks. For example, if a customer owes you a balance of $10,000 on December 31, 2013 and you are setting up your company starting January 1, 2014, you will enter $10,000 in the opening balance field when you are setting up your customer in QuickBooks. All sales receipts and Invoices processed subsequent to the date you have started your business in QuickBooks, should be created and payments applied as necessary.
Employee Setup
If you are not a sole proprietor and have employees, you can setup your employees in QuickBooks and process their paychecks in QuickBooks. The desktop version allows you to house your payroll information on your desktop, but with the Mac and Online versions of QuickBooks your payroll will be housed “in the cloud” meaning remotely on Intuit’s server. They all will produce your employee(s) paycheck(s), but the difference is in the method used to generate them.
You can visit my step by step QuickBooks Tutorial website where you will find step by step instructions for setting up your company in QuickBooks and everything QuickBooks related. Please feel free to share your thoughts on this topic, and add any input you have.


Recent Comments