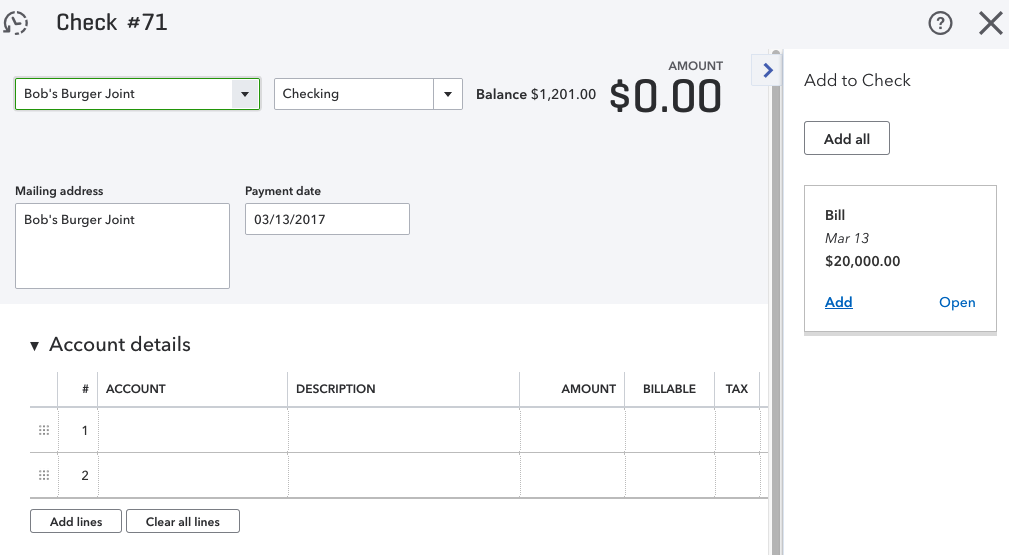
If you try to write a check to a vendor who has an open bill in QuickBooks Online, a tab will open to the right showing the open bills for that vendor, and asking if you wish to add the bill to the check (as shown in screenshot below). When you click Add, the payment will automatically link to the bill which will zero it out from the vendor balance as well as the accounts payable.
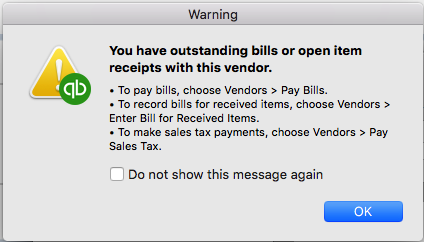
If you attempt to write a check for a vendor who has an open bill in QuickBooks Desktop versions – Pro, Premier, or Enterprise, you will get a warning (as shown in screenshot below) or similar. If you continue to write the check for a bill instead of using the pay bills feature, not only will that bill remain open and unpaid in QuickBooks, but you will have doubled your expenses for that particular expense or cost of goods sold account.
NOTE: It’s never a good idea to change transactions for past periods, so if you have already filed your taxes based on the information you have in QuickBooks, you will need to speak with your CPA or tax preparer prior to making any changes to those periods that have already been reported.
To correct Vendor Balances in the Desktop versions – QuickBooks Pro, Premier or Enterprise, due to the Write Check feature Being Used Instead of the Pay Bills feature, follow these steps:
- Open the checks that were paid for each bill, and change the account from the expense used to Accounts Payable (as shown in screenshot below).
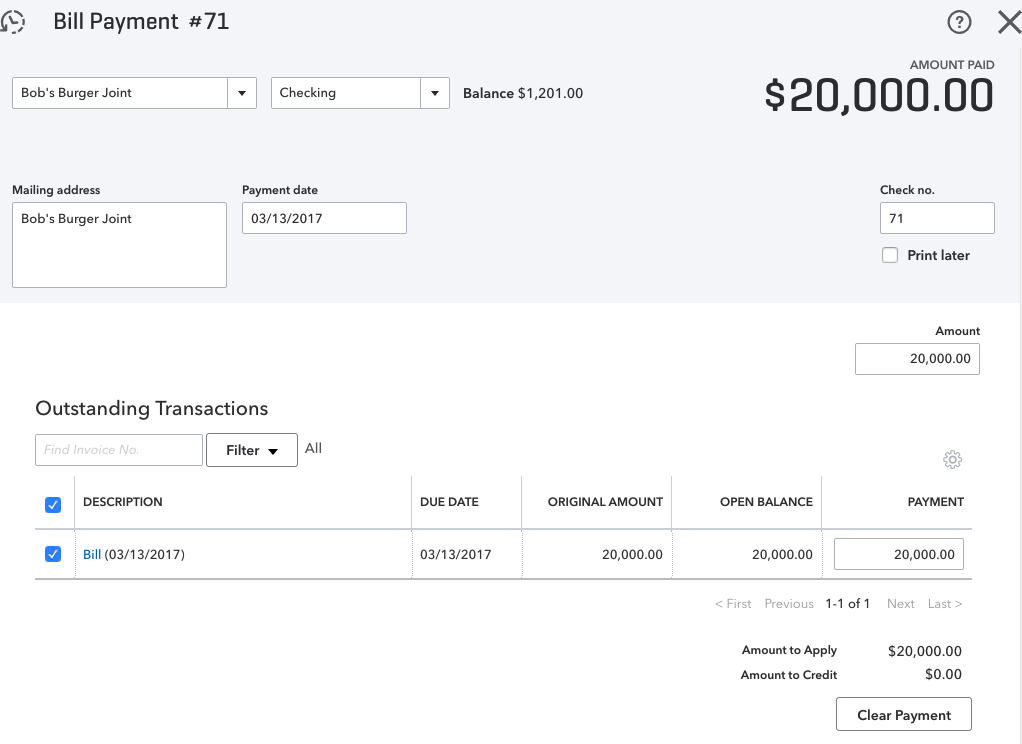
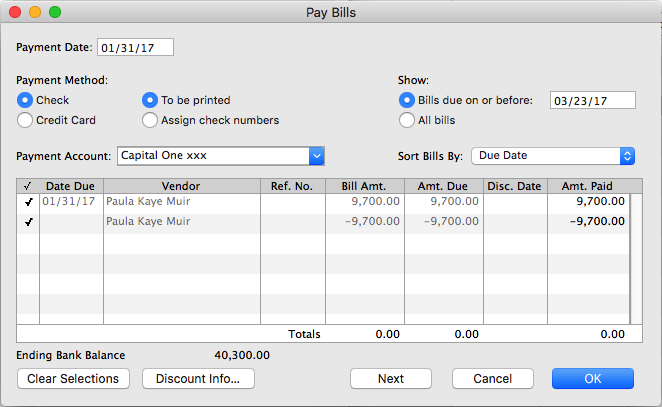
- Next, go to Vendors, then Pay Bills and click to the left of each transaction to checkmark them (as shown in screenshot below) (One is the bill and the other is the check).
- Change the date to reflect date of check used to pay this bill.
- Click OK, Save or Save and Close.
- If you pay bills as they arrive and do not need to see reports on how much you owe vendors, use Write Checks.
- If you prefer to pay bills all at once for example on the same day each month, and you want to see reports on how much you owe vendors, or if you usually make partial bill payments, then use Enter Bills and Pay Bills which are both linked to Accounts Payable.

Now when you look at your vendor balance, those amounts should not be included. Also, if you look at your Accounts Payable on your balance sheet, those amounts should not be there. If there are a lot to be done, you may edit all the checks and change their accounts to “Accounts Payable” first, then go to “Pay Bills” and select them all. Just be sure the “Totals” amount in the “Pay Bills” window is zero before hitting that Ok, Save, or Save and Close button.
NOTE: If a portion of the individual bills were paid with the “Write check” feature and the other portion with the “Pay bills” feature, the above-mentioned solution will work as well. Just ensure that the checks you are editing and changing from their respective expense account to Accounts Payable, are the ones that do apply to the respective vendor/vendor bill. Also, whatever you do, do not delete any checks or payments for any period that was already reconciled. It will definitely throw off your reconciliations!
Remember: A bill will remain in open/unpaid status after writing a check if you used the QuickBooks “Write Checks” feature rather than the “Pay Bills” feature to pay it. This is so because the two Accounts Payable features – Enter Bills and Pay Bills, work together. If you use Write Checks with Enter Bills, the check will not be linked to the bill, and the bill will remain in open/unpaid status.
Here are Two (2) General Guidelines to Follow When Deciding How to Make Payments:
Use the above-mentioned method to correct your vendor balances, and remember to always use the “Pay Bills” feature if you used the “Enter Bills” feature, and not the “Write Check” feature – moving forward.
Wow! Thank you so much for this very useful information. This was exactly what I was looking for, and it worked!